Important note: This article contains information regarding our Dedicated product. If you are looking for documentation regarding the cloud data annotation platform, please visit all other categories in our larger Success Center.
Overview
This section is intended for the Administrator (System Admin) and describes the various administrative functionalities. The following login (cf_internal@figure-eight.com) is akin to the system admin of the system and has permission to access any entity in the system.
Logging in as System Admin
Go to https://<YOUR_CUSTOM-DOMAIN>.com/make. The credentials to use in order to login as the Dedicated System Admin are the cf_internal@figure-eight.com email and password provided in the install guide. Please contact your Dedicated Success Team for the default password, if needed.
For maintaining security, this password should be changed on your first login.
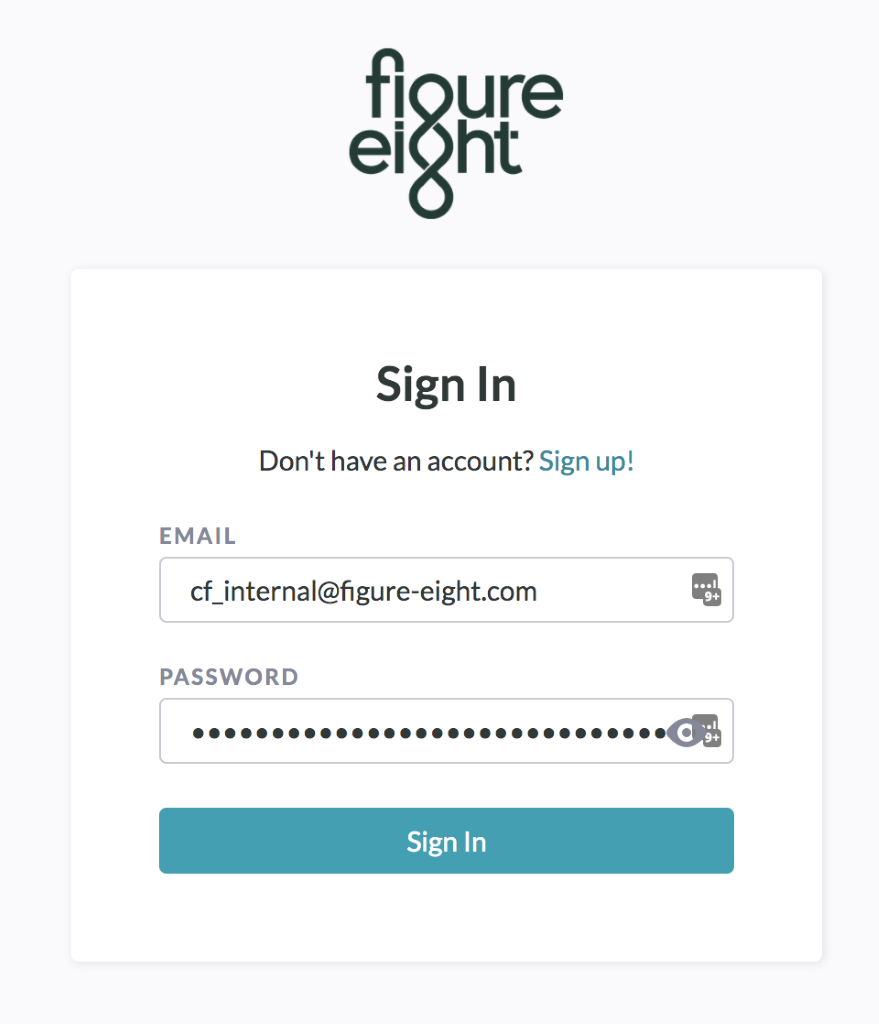
Figure 1: Sign in as the cf_internal System Admin
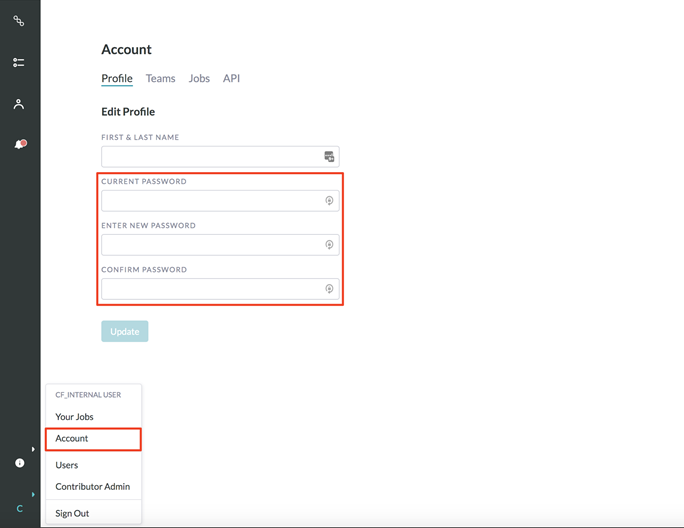
Figure 2: Change password upon initial login
To change your password fo the cf_internal user menu, select account, and update your details.
Adding Requesters to Your Team
Logged in as a System Admin, select “Account” from the dropdown menu on the top right hand corner (where your username is) and navigate to the “Teams” tab. Input the email of the user you would like to add to your team and select the “Send Invite” button.
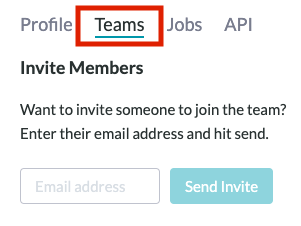
Figure 3: Navigate to the "Teams" tab to input the user you would like to add
Once sent, the new user should sign up with the input email and their account will be assigned to your team.
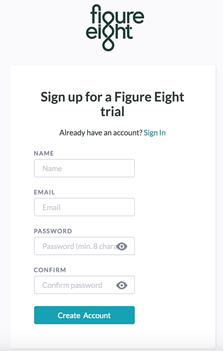
Figure 4: New user Sign Up page
Once a user has been invited to your team, they can sign up for their account using the email you entered, and creating a password at URL: app.{{your-custom-domain}}.com/make or via an SSO provider.
Creating New Teams
To create separate teams from the System Admin cf_internal team, follow the steps below:
- Log into the cf_internal account
- Add a new user to the cf_internal team
- The user must accept the invitation by logging in
- Once the user accepts the invitation and their status is no longer “Pending,” remove that user from the cf_internal team
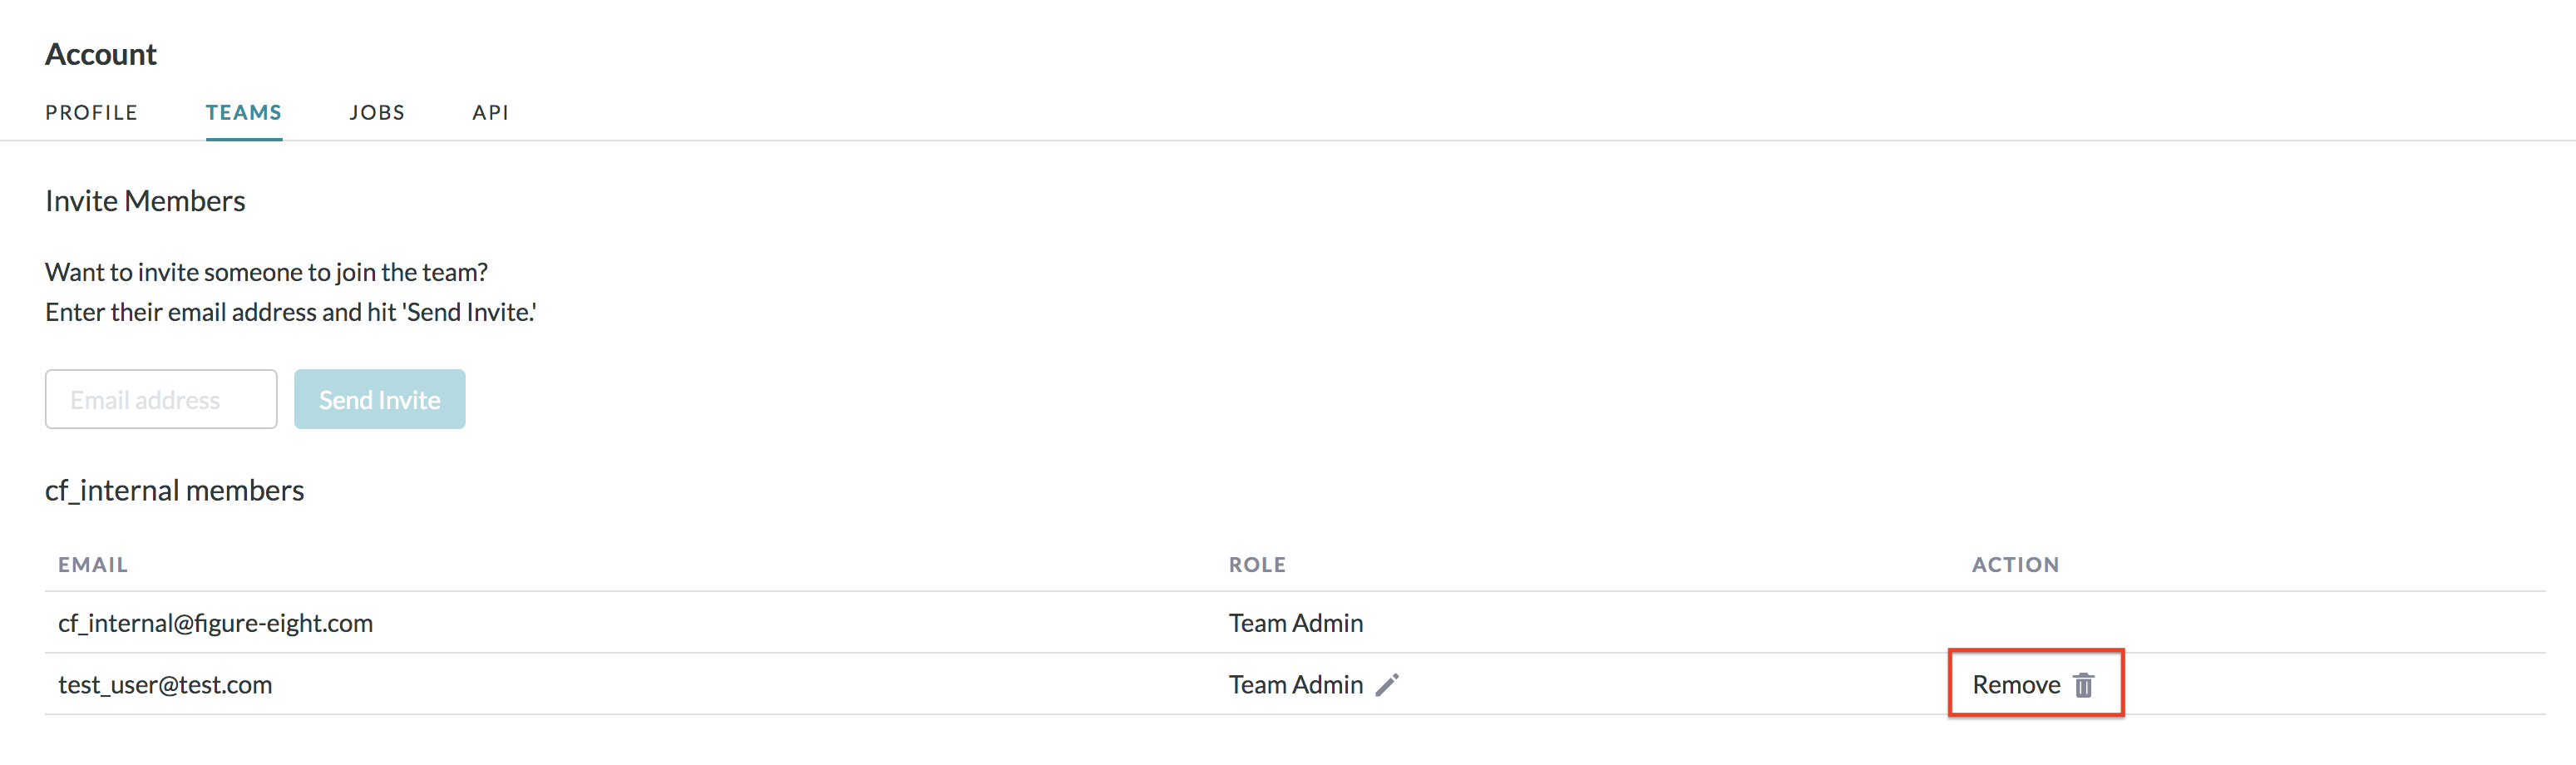
Figure 5: Remove the user from the cf_internal team
- Go to the Users tab by navigating to the “Users” section of the menu and search for the user:
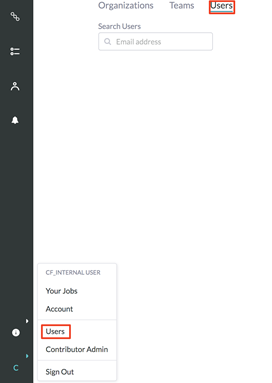
Figure 6: Search for the user
- There are two options at this point, you can add the user to an existing team, or you can make this user an admin of a new team
- To add the user to an existing team, see “Adding a User to an Existing Team” below.
- To create a new team, see select “Upgrade” and continue to enter a team name without any punctuation or special characters (spaces are acceptable).
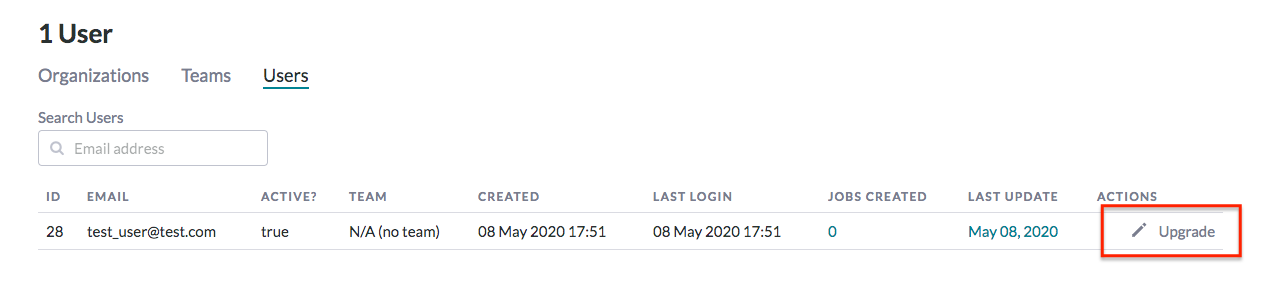
Figure 7: Click Upgrade to create a new team
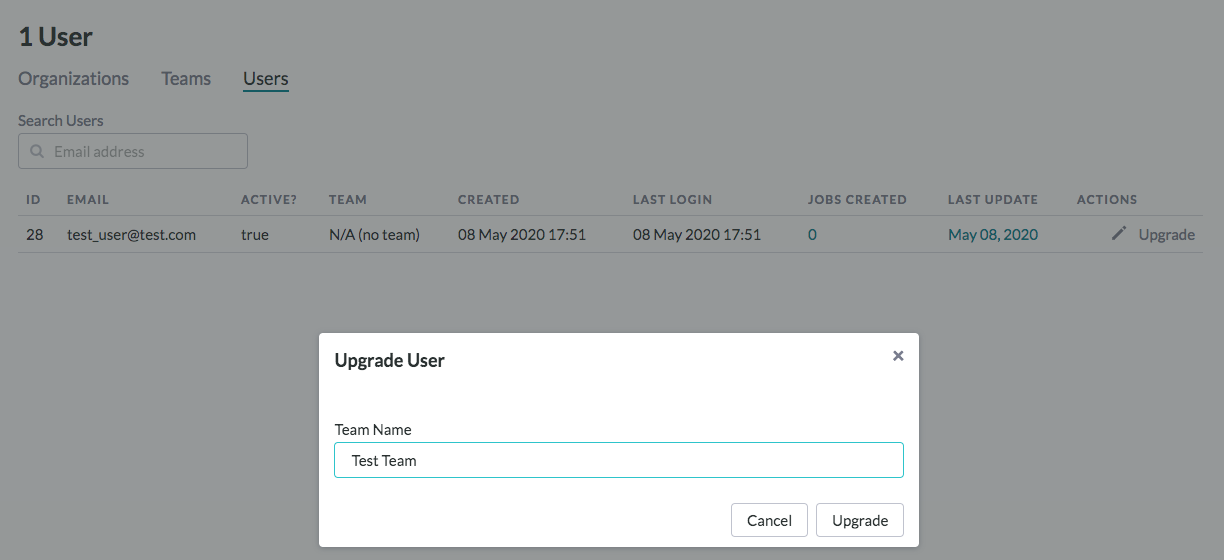
Figure 8: Enter a team name
-
- After Selecting “Upgrade” let the page reload. You may have to close the pop-up and refresh the page manually (ignore any error messages).
- Notice, the team field in the user-row has been filled with the new team name
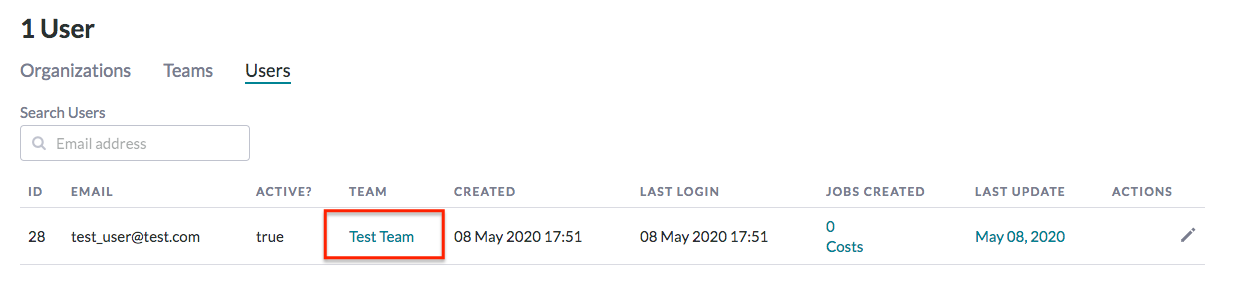
Figure 9: The new team name will appear after reloading the page
- The team is now created, but you will need to add a subscription to the team page. Click into the team name (now a link) to do so.
- Select the pencil icon next to “Team Details”
- Fill in the details as below and save changes at the bottom of the page:
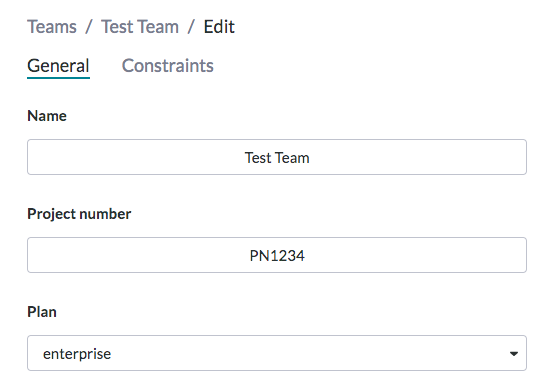
Figure 10: The form to add subscription details
- Navigate back to the team page and scroll to the “Subscriptions” section
- Select “Adjust Rows” and input the desired number of additional rows and a note for increasing or decreasing the row volume
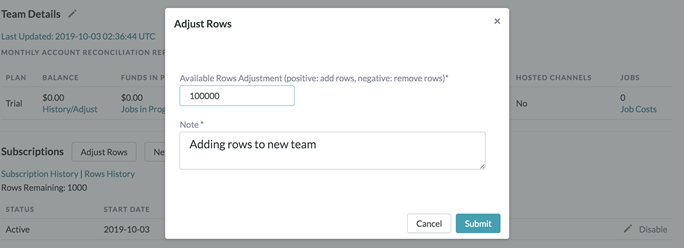
Figure 11: Adjusting the rows associated with a subscription
Adding Users to Existing Teams
- Create a new user account (See Steps 1-4 of “Creating a New Team”)
- Go to the customer tab in the top right dropdown and search for the existing team
- Click into the team page
- Scroll to the “Team Members” section and select the “Add User” button
- Input the new user email and add the user to the team
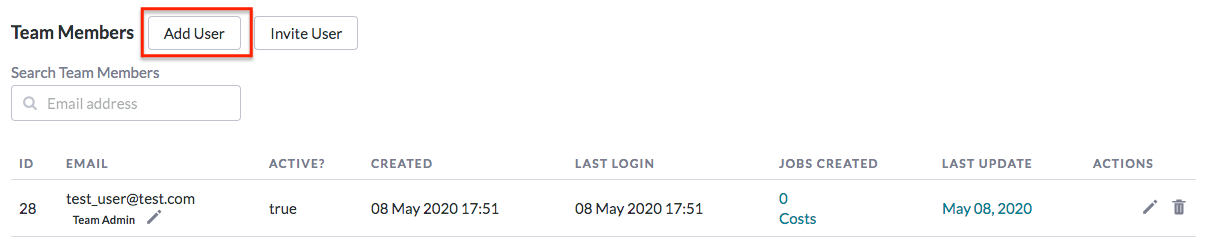
Figure 12: How to add a new user to an existing team