Overview
The cml:audio_annotation tag allows users to create an audio annotation job with a custom ontology. This allows users to annotate audio files with segments and events based on a custom ontology.

Fig. 1: Audio Annotation Interface for Contributors
Building a Job
Data
- The audio annotation tool supports the annotation of .wav and .mp3 type files.
- Audio files are required to be hosted in a CORS configured bucket.
- All data access control features are supported for this tool, including Secure Data Access.
CML
As this is an open beta tool, there is no Graphical Editor support for this tool yet. For access to the tool’s CML gem, please reach out to your Customer Success Manager.
Parameters
Below are the parameters available for the job design. Some are required in the element, while some are optional.
source-data(required)- The column from your source data containing the audio URLs to be annotated.
name(required)- The results header where the annotations will be stored.
label(optional)- The question label the contributors will see.
validates(optional)- Defines whether or not the element is required to be answered.
- Accepts 'required'
- Default is not required if not present.
review-data(optional)- This will read in existing annotations on an audio clip.
- If used, a source column with links to the annotations formatted as we output them is required (example format below).
- May be used to do peer review or model validation job.
task-type(optional)- Please set task-type=”qa” when designing a review or QA job. This parameter needs to be used in conjunction with review-data . See this article for more details.
Ontology
Audio annotation jobs use a custom ontology editor that is specific to the audio annotation tool. You can access it by clicking into the Ontology Manager link that appears on the right corner of the job's Design Page.

Fig. 2: How to find the Ontology Manager via the Design Page
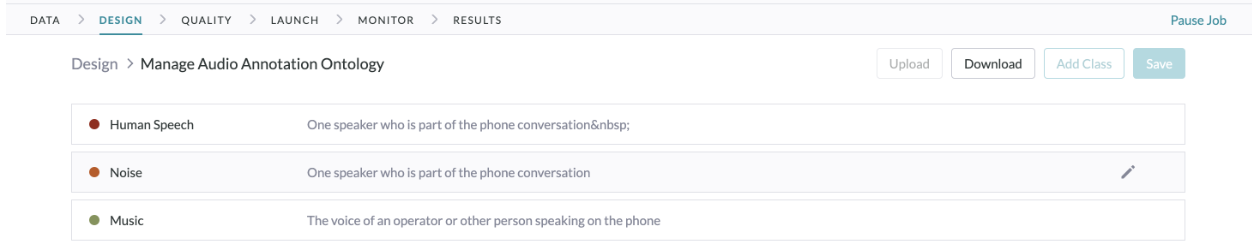
Fig. 3: The Ontology Manager
Every class in the ontology will have the following attributes:
- Title
- This is the class name that will appear in the results and to the contributors working in the job.
- Instances
- Any class can be enabled to have instances. This is especially useful if you expect there may be multiple unique instances of one class.
- Example: If there are multiple people speaking in one audio file, instances can allow annotators to enumerate them and annotate separately.
- Instances are disabled by default.
- Any class can be enabled to have instances. This is especially useful if you expect there may be multiple unique instances of one class.
- Description
- Descriptions can be used to give clear instructions to contributors on what you want to be annotated in the class.
- Color
- The color of each class.
- Unlike other annotation tools, the platform will auto-assign annotation colors to each class. There are 16 pre-selected easy to read and use colors.
- If you would like to add custom colors, you may upload your ontology manually with a CSV file.
- A sample CSV file is attached to the bottom of this article.
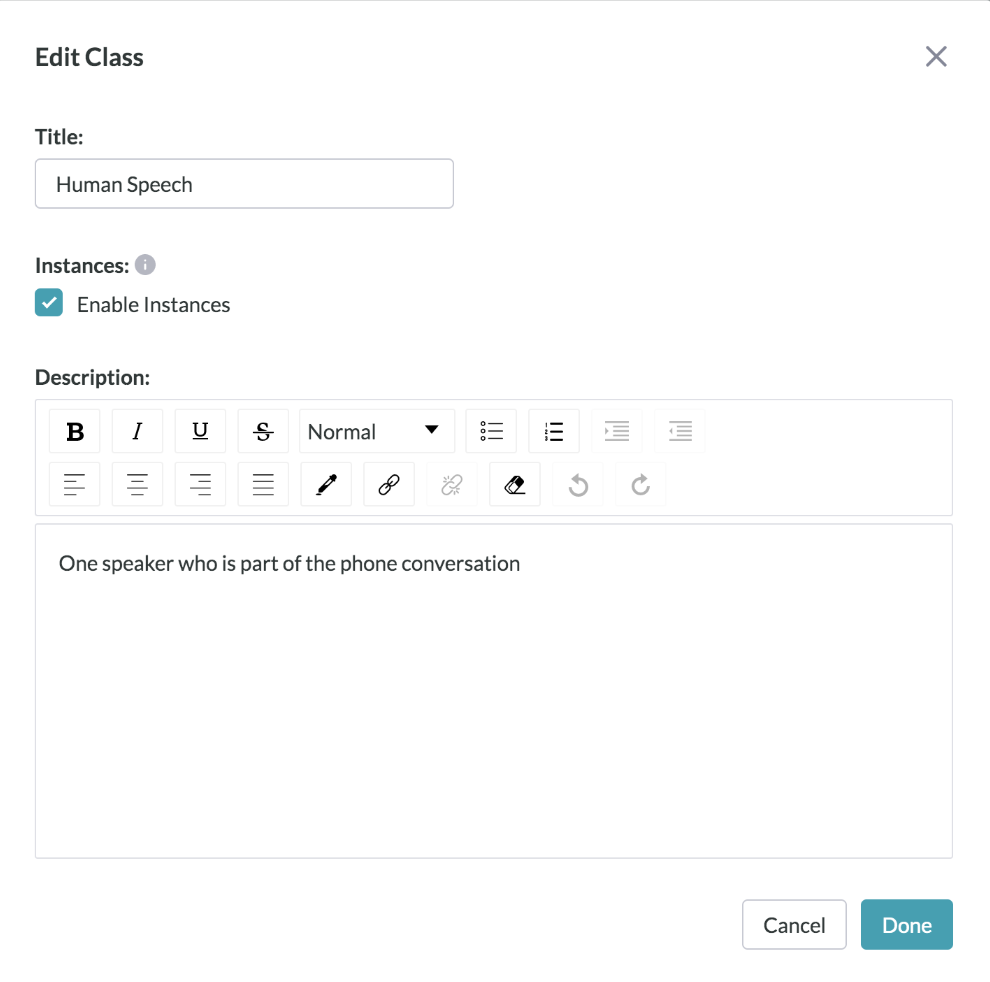
Fig. 4: Editing a Class in the Audio Annotation Ontology Manager
Reviewing Results
Results
Results will be provided as a secure link to a JSON file describing the annotations.
Please note: Due to security reasons, JSON result links will expire 15 days after generation. To receive non-expired result links, please re-generate the result report.
The objects in the JSON include:
layerIDandID- The universally unique identifier of every annotation, along with the ID of the layer it belongs to. All unique instances of the layer will have its own ID so they can be connected across multiple segments.
startTimeandendTime- This will be displayed in seconds, to the millisecond.
ontologyName- This is the class name the contributor assigned to the segment.
- If instances are enabled, integers will be appended to distinguish between different instances.
annotatedBy- This will be
"Human"if annotated by a contributor and"Machine"if left unannotated in the judgment by the contributor.
- This will be
nothingToAnnotate- This will be Boolean
trueorfalse. - This will be true if the contributor does not have a judgment they could make.
- Example: The audio does not include any speech.
- This will be Boolean
Below is an example of the JSON results:
{

"annotation": [

[

{

"id": "10b784ae-74a4-49bd-ba39-c11d086fd7f6",

"layerId": "a7a09d79-7526-43be-a9ae-a3cf1d7a94d9",

"startTime": 111.375,

"endTime": 149.486,

"ontologyName": "Class 1"

“annotatedBy”: “Human”

}

"nothingToAnnotate": false

"ableToAnnotate": true

}
Reviewing Results
To review the results of your job in the Appen UI, you can do the following:
- Go to the Data Page of the job.
- Click on a unit ID to view the unit page.
- A custom widget loaded with the contributor's annotation to review will be displayed.
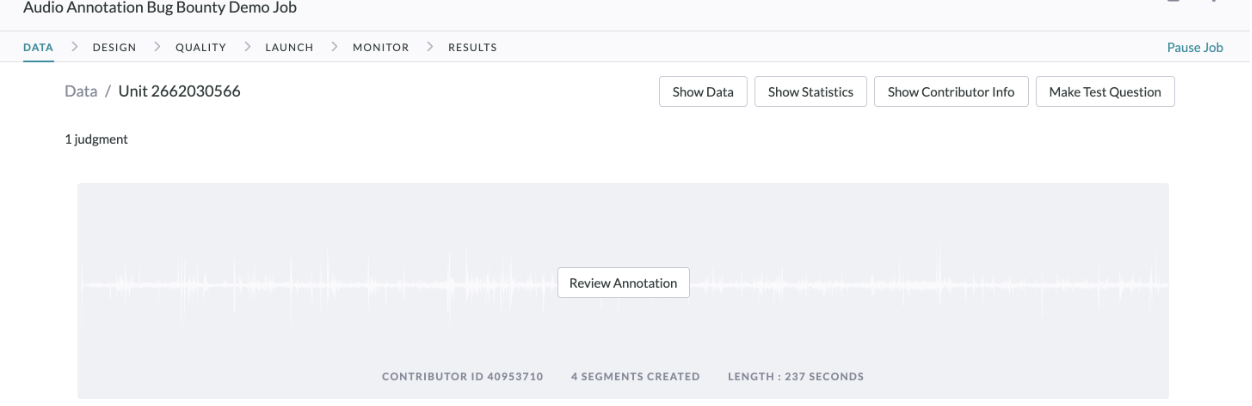
Fig. 5: Reviewing Annotations via Unit Page
Additional Notes:
This product is in BETA, so please consider the following important notes:
- The job must be set-up in the Code Editor; the tool is not supported in the Graphical Editor yet.
- Audio Annotation jobs do not support test questions or aggregation at this stage.
- Launching this type of job requires one of our trusted contributor channels. Please reach out to your Customer Success Manager to set this up.
-
The segments within each class or instance cannot overlap. If you would like overlapping segments to be created within a class, please allow instances within that class, or create multiple classes.
-
If you want neighboring segments to be annotated back to back, with no gaps in between, you can instruct annotators to turn on the "snap mode" feature (top right corner of the annotation tool UI) to ensure that the boundaries of the segment they're annotating get snapped to the boundaries of neighboring segments when they're less than 0.1 second apart.