The Graphical Editor is a simple and easy way to allow you to create a job without typing any code. If you would like to create a job with cml:shapes in the graphical editor, please see this article.
There are three different components of the Graphical Editor:
- Title
- Content - Insert Data and Add Questions
- Instructions
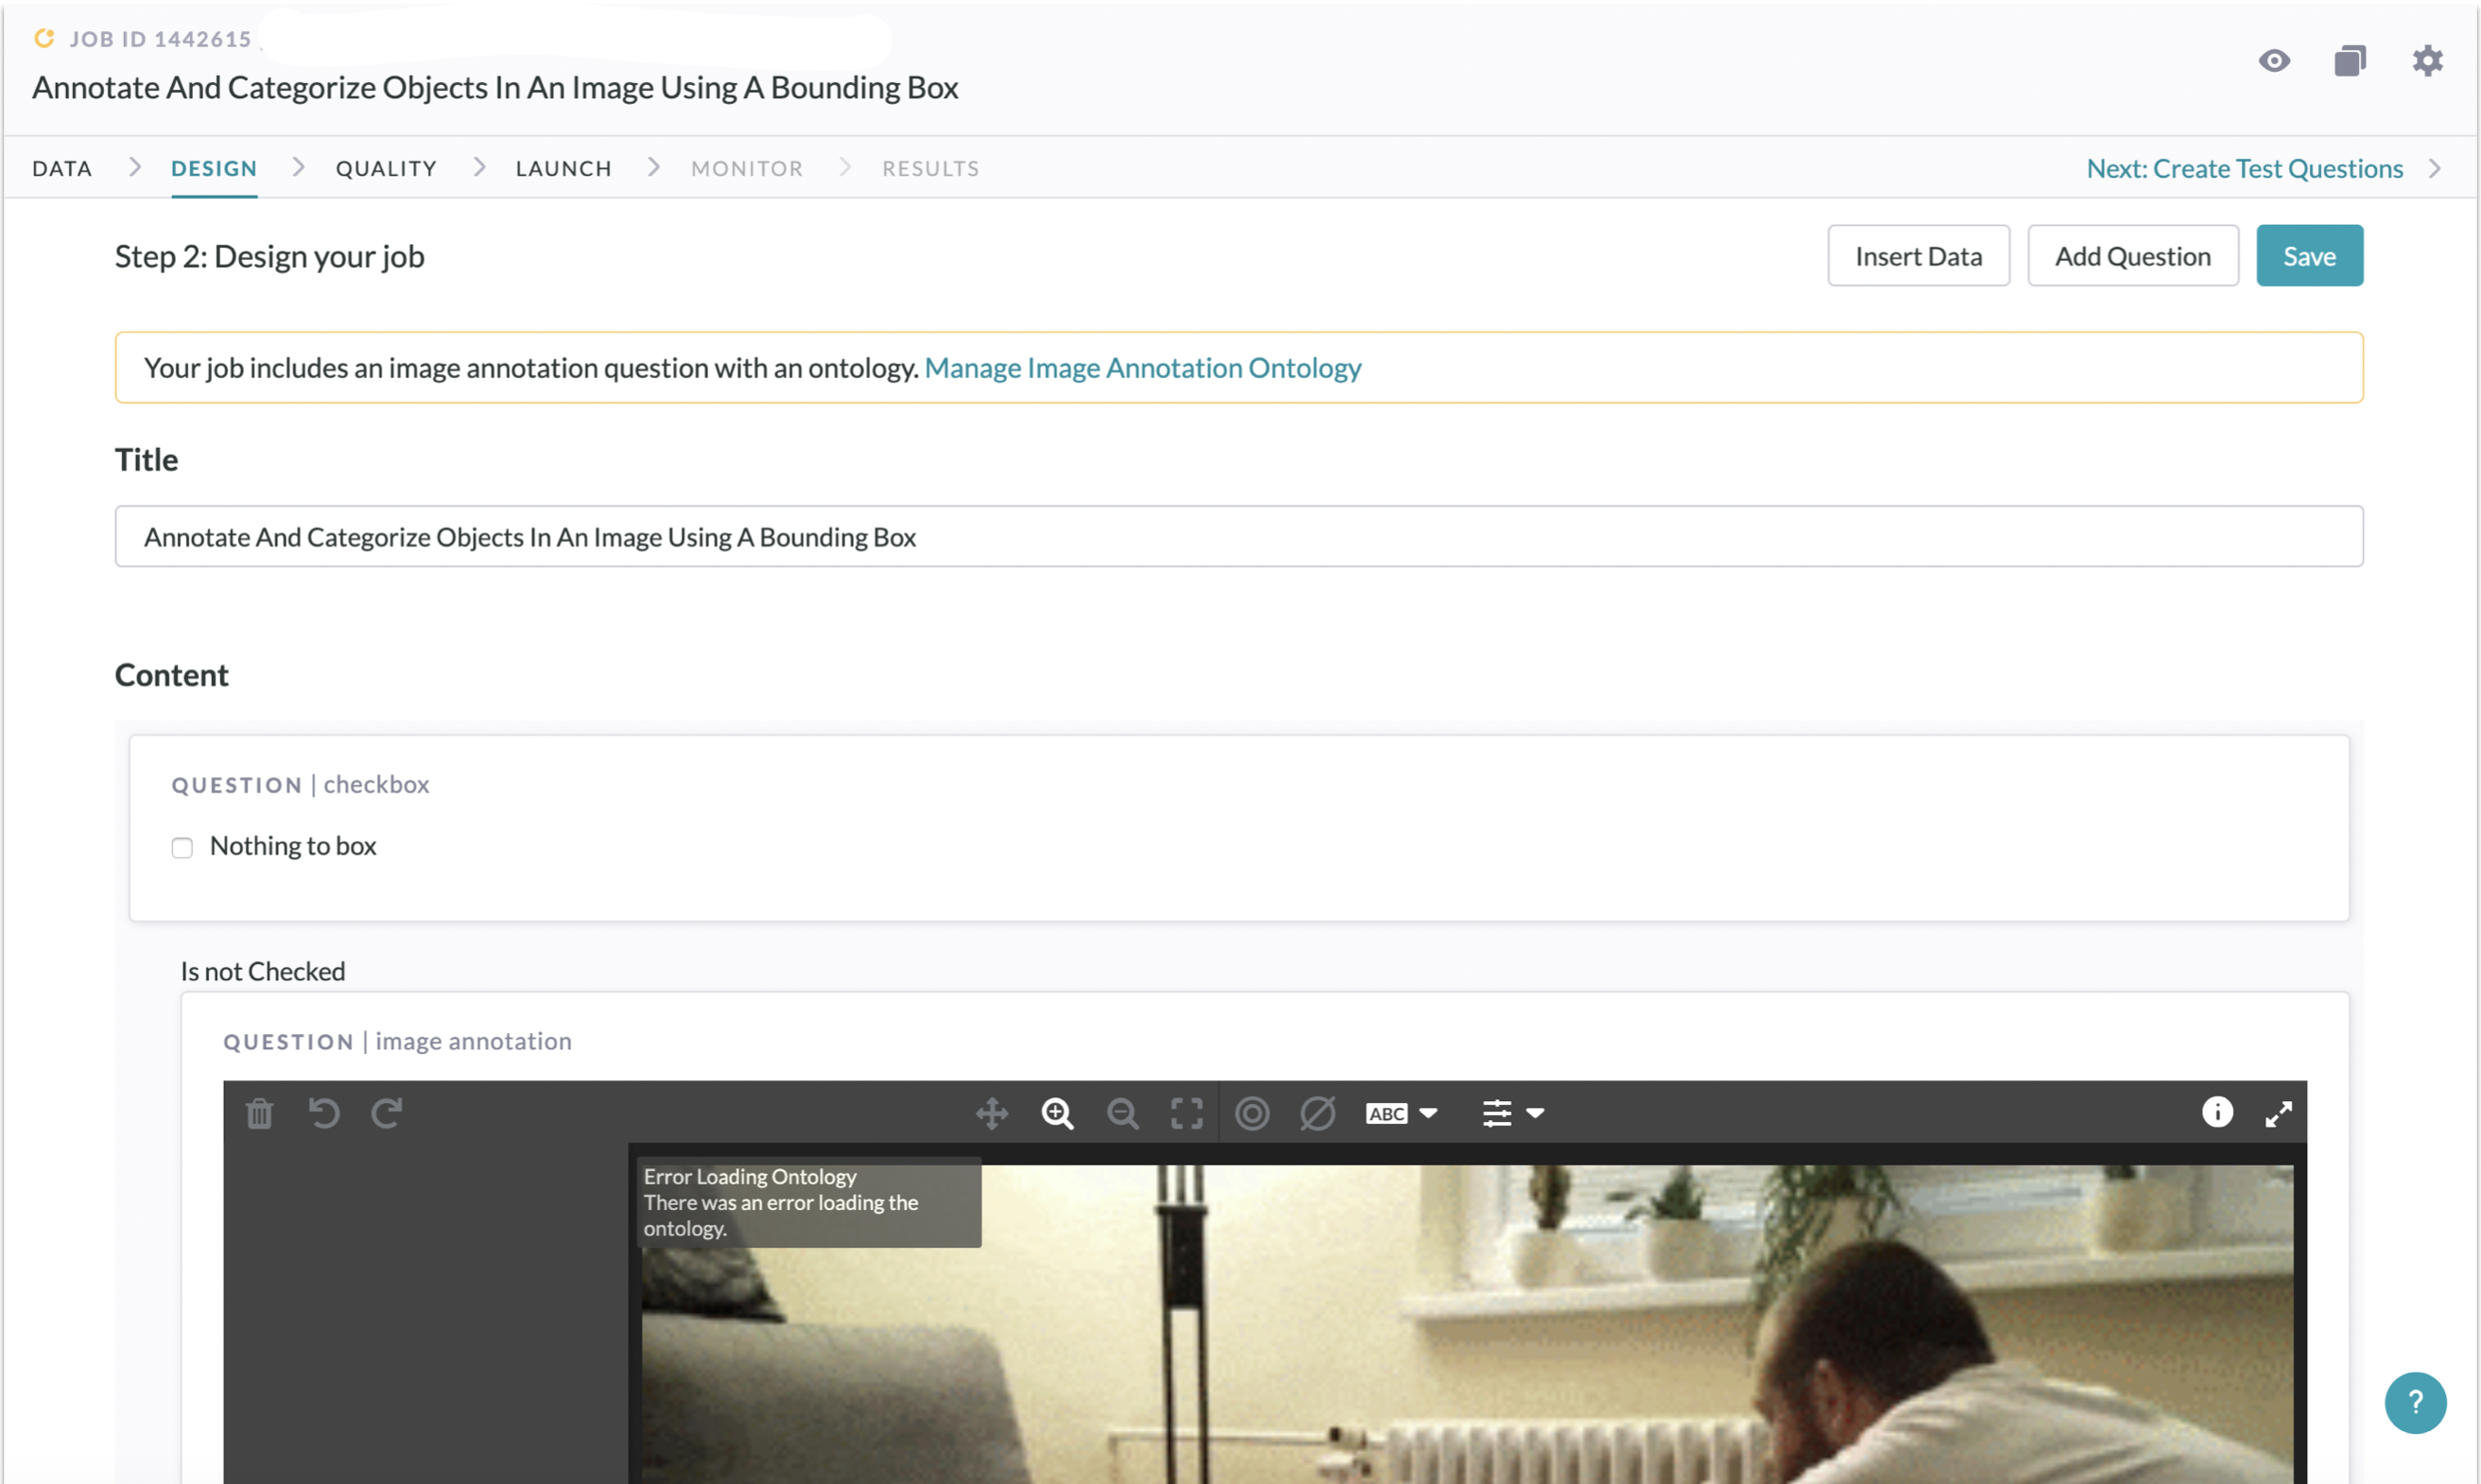
Fig. 1: Layout of the Graphical Editor
Title
Enter the title of your job in this field.
Content
There are two main types of elements in this section, Data and Questions.
Data refers to any data uploaded into the job or information needed for the contributors to reference when answering the questions in the job.
Questions are what contributors will be answering to complete your job. They come in different forms such as multiple choice, checkboxes, textboxes, etc.
Insert Data
To show source data in the job:
- Select the "Insert Data" button at the top
- Once selected, all column headers from your data will be shown – add them to your job by selecting them
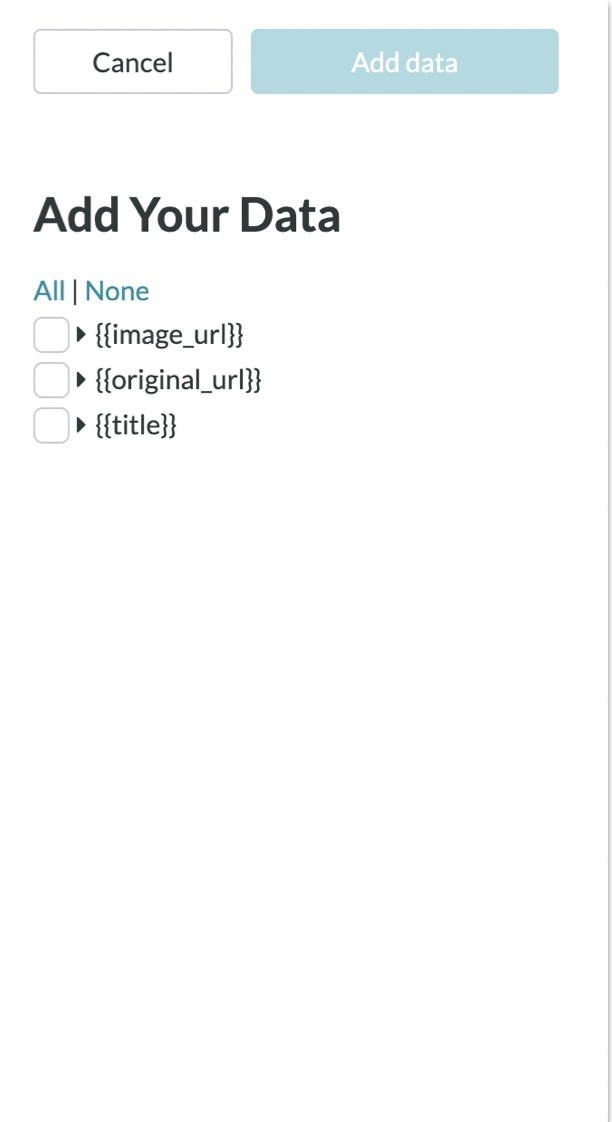
Fig 2. Insert Data
- Determine the format of how the data is shown by selecting the column's checkbox. To select the "Display Type" click on the small arrow next to the checkbox. You have these options of display types:
- Text: plain text format
- Link: data is a hyperlink
- Image: data is a link to an image (as seen below)
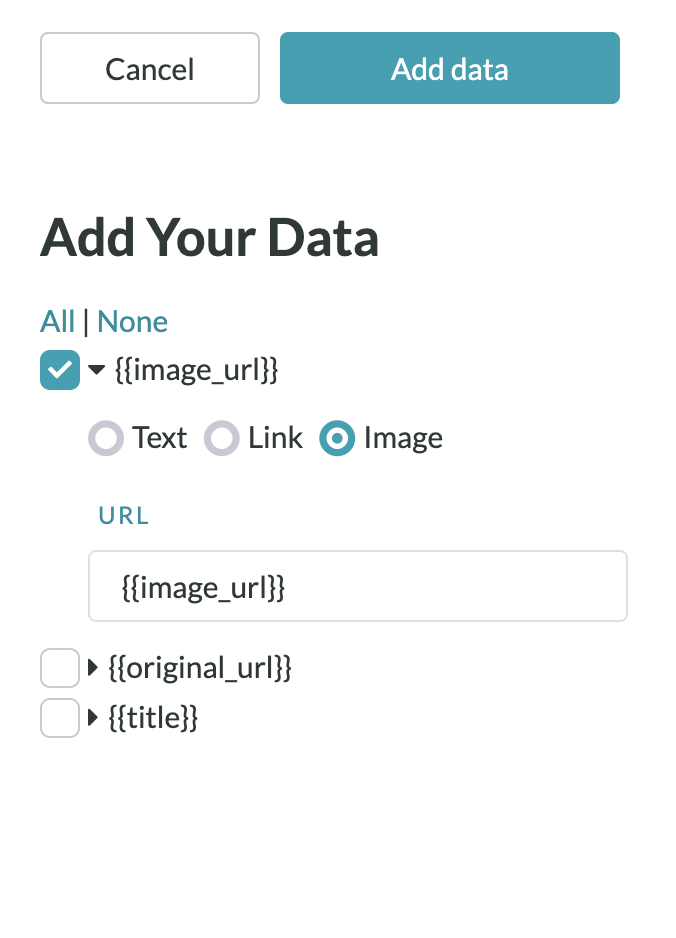
Fig. 3 Insert Image Data
- Click "Add Data" when finished
You can also format and edit the look of the content by selecting the "Edit" button in the top right corner of the data box. A text editor toolbar will appear once the "Edit" button is selected.
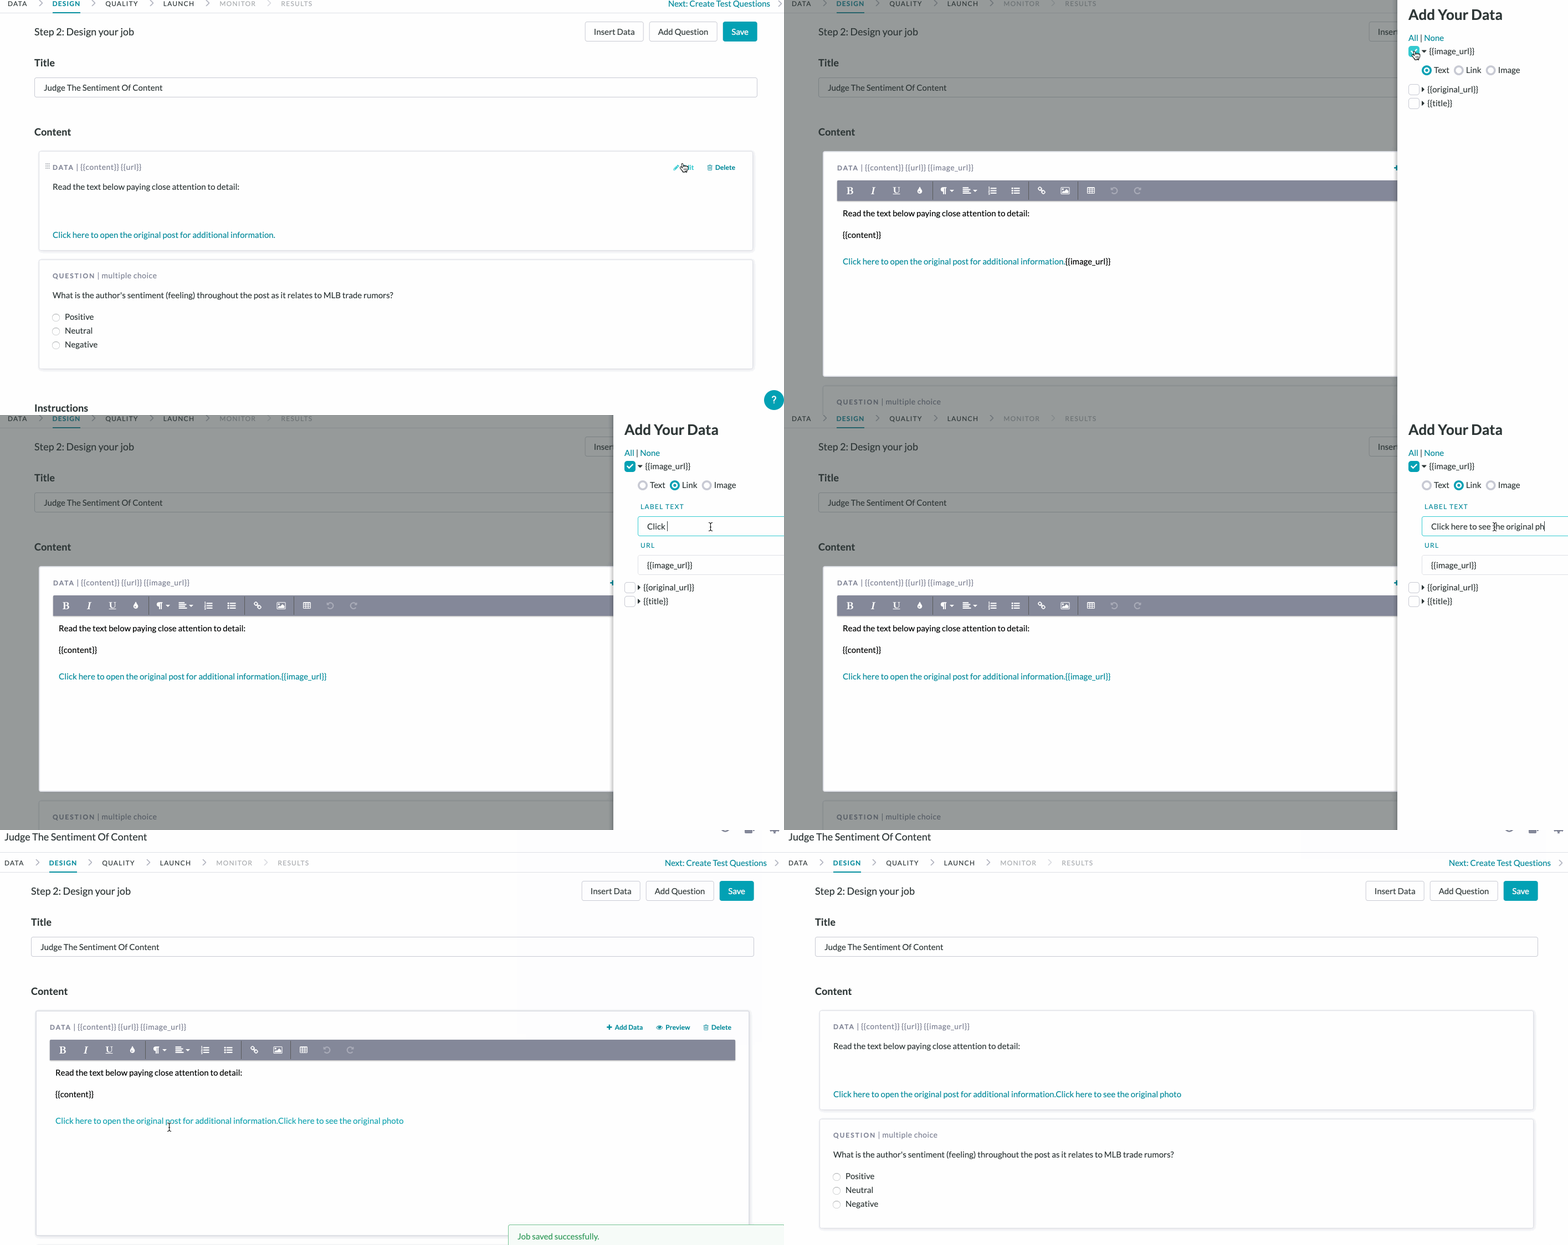
Fig 4. Edit Data Format
Add Question
To add a question in the job:
- Select the "Add Question" button at the top
- Once selected, a list of all possible question types will be shown - you will be able to customize the question after selecting one
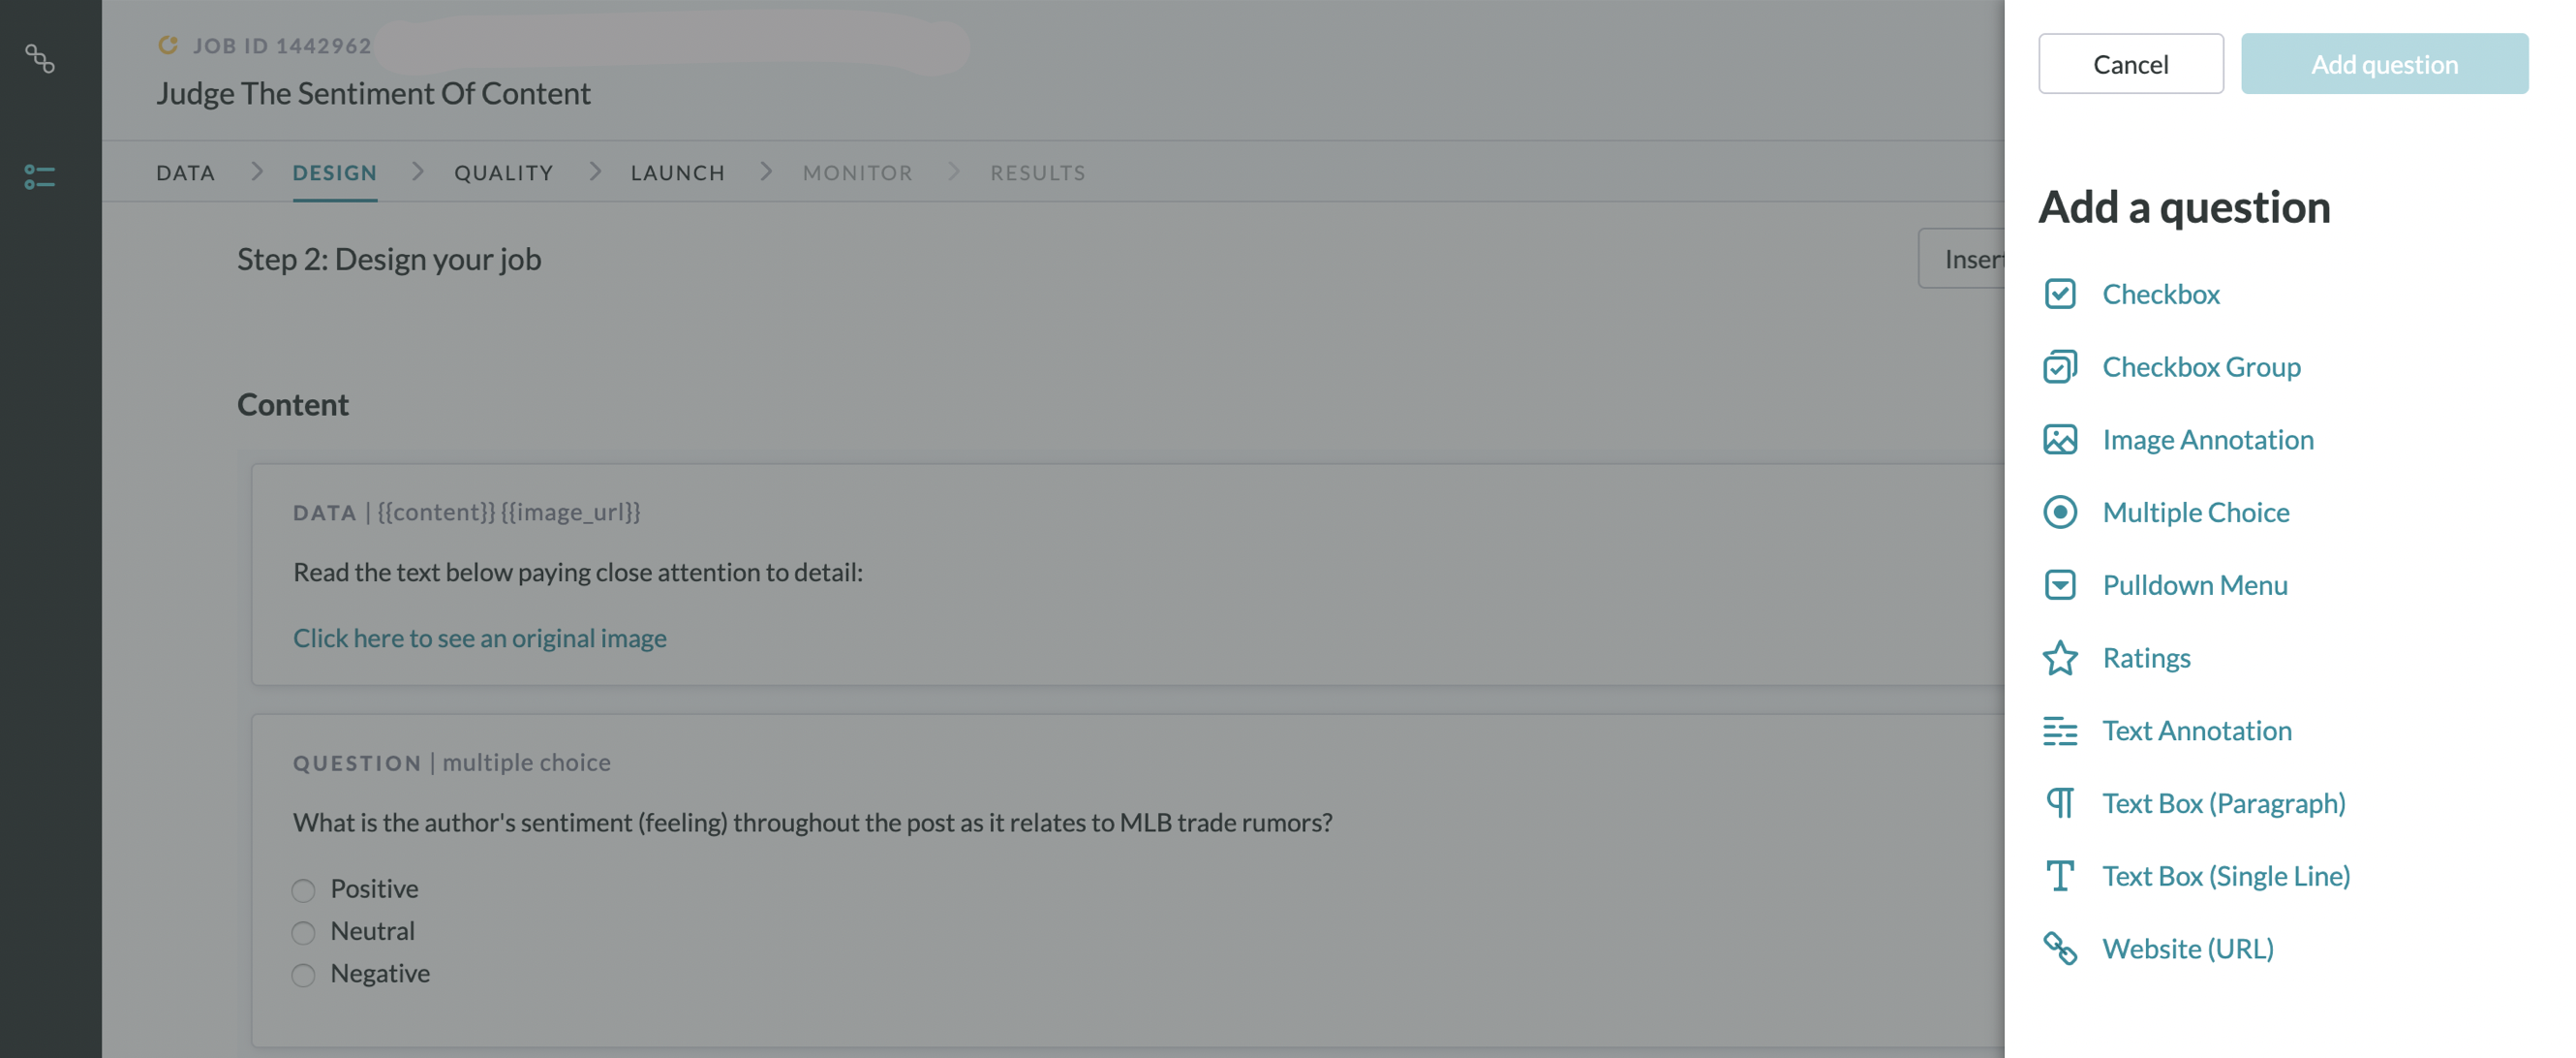 Fig. 5 Add Question
 - Depending on the question type, the following fields will need to be updated:
- Question Text: The text of your question
- Label: The text of the answer to the question
- Value: The answer value of the answer to the question
- Default: The answer is selected by default
- An answer is required:
- Yes - The question must be answered before submitting work
- No - The question does not need to be answered before submitting work
- Additional Options:
- Tips/Hints: Additional instructions/notes for the question
- Results Header: Reference column header name for the question in the results
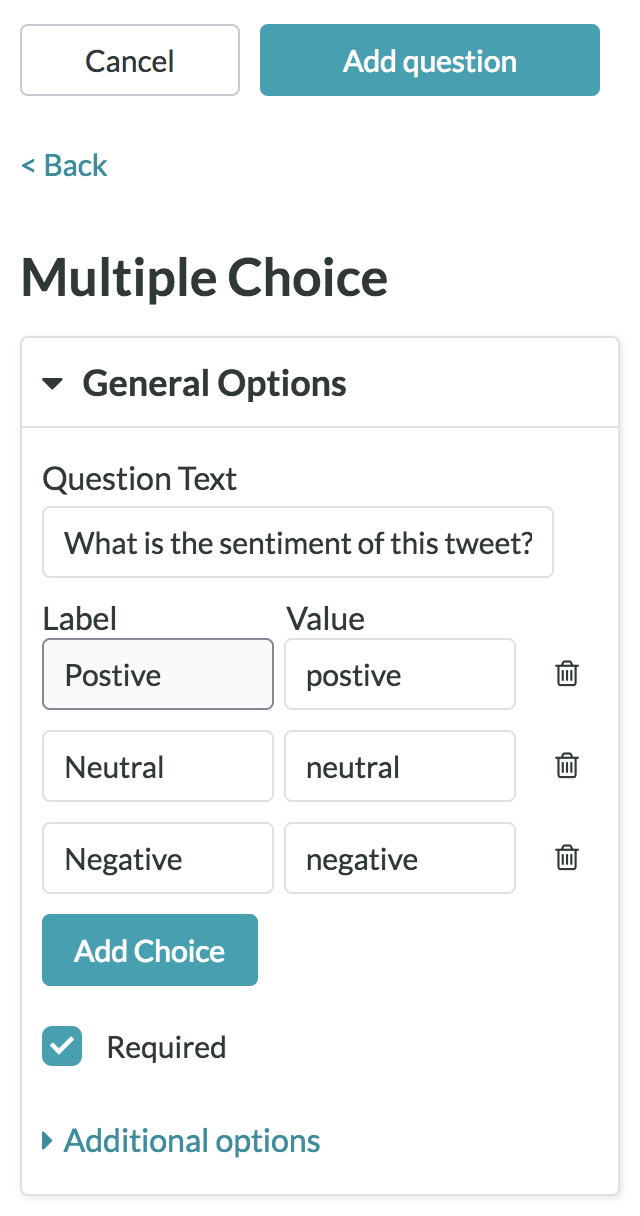
Fig. 6 Add Additional Questions
- Click "Add Question" once all changes have been made
Response Validation
- The response validation field will appear when you are creating a text box question in a job. This field will allow you to include a specific text validator that will require inputs to be in a particular format.
- There are 2 different types of validation:
- Basic Validation: Requires Contributors to respond in your desired format
- Smart Validation: Reduce error rates by up to 35% with our machine learning Smart Validators. Available as an add-on — please visit this article for more details or click here for a free trial.
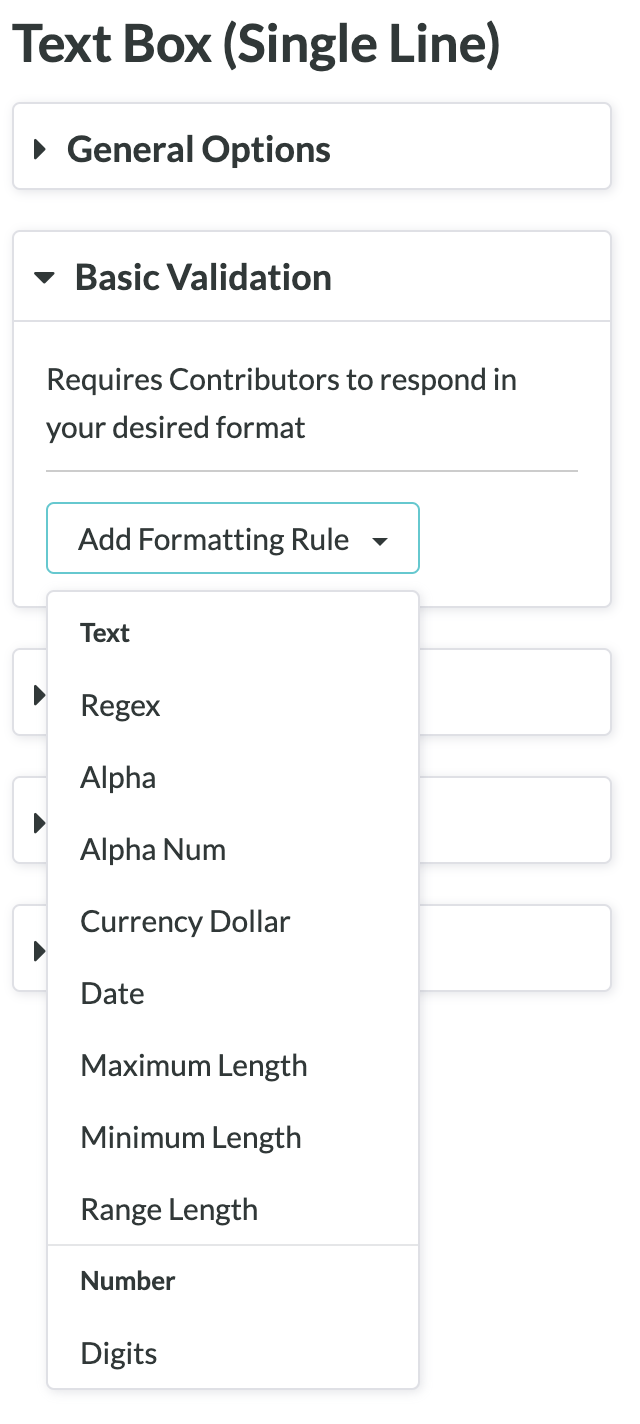
Fig. 7 Basic Validation
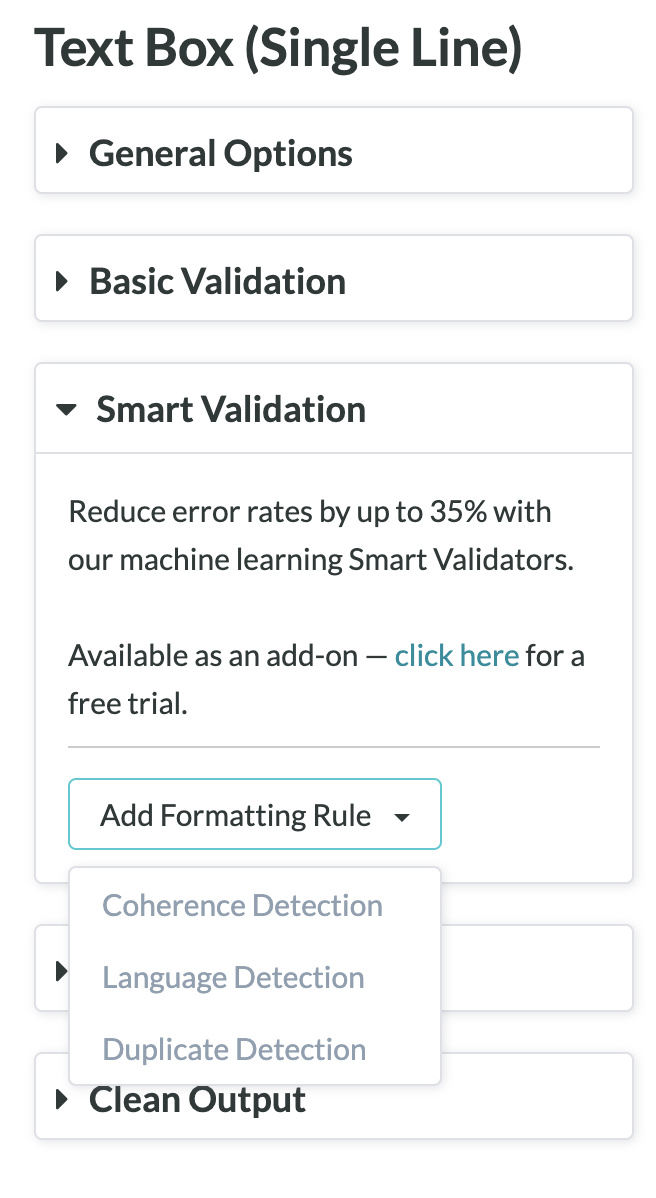
Fig 8. Smart Validation
Appen offers number, text, web, and address validators. To learn more about the different types of validators, please read our Guide to Validators article.
Logic
If there are questions created prior to the question you are adding, there is an option to add conditional logic. Conditional logic is used to show certain information depending on a previous answer in the same job.

Fig 9. Conditional Logic
To add conditional logic to a question:
- Select "Conditional Logic"
- Select a question to trigger logic: This is the name of the question
- Show this when: Select "Is" for when the indicated answer option should be selected or "Is not" when everything else but the indicated answer option is selected. The dropdown field below contains all possible answer options to the selected question. Select a specific answer from this list to reference the condition for the current question to appear on
Clean Output
For free-response fields or text boxes, Appen offers the ability to normalize inputs by either adjusting input capitalization or trimming input spacing.
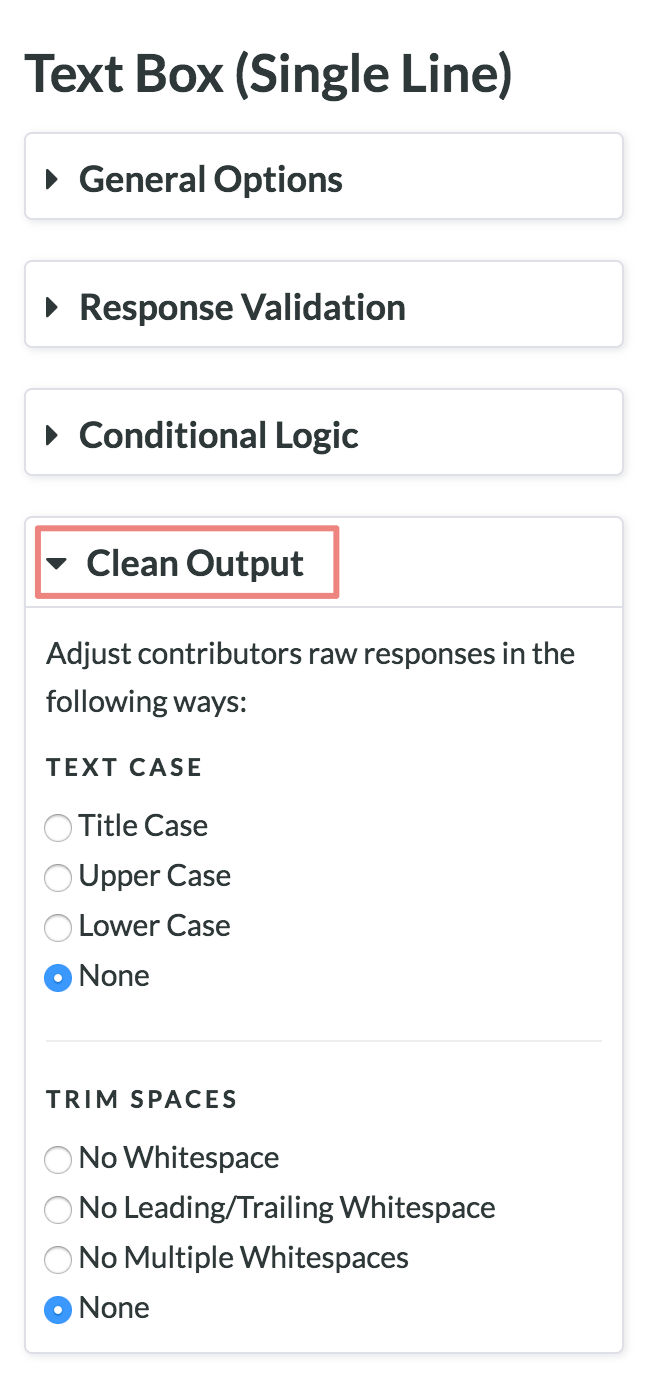
Fig 10. Clean Output
Take a look at the clean output validators section of our validators article for more information.
Instructions
Enter the instructions of your job in this field. Use the Instructions Template to help you write the best instructions possible.
Just like the data content editor, there is a text editor for the instructions for easy formatting and styling. The following functions are available in the text editor:

Fig. 11 Instructions Editor
- Styling
- Bold
- Italicize
- Underline
- Color (Background/Text)
- Formatting
- Text formatting
- Alignment
- Numbered list
- Bulleted list
- Media
- Hyperlink
- Image upload/link
- Video upload/link
- Table Creation
- Undo
- Redo
- HTML Code Editor View
Code Editor
If you would like to view the CML code for the job, you can click on the "View Code Editor" link at the bottom of the Graphical Editor page for a more in-depth look into the job.
You can implement custom CSS and JavaScript in the Code Editor. Take a look at the guide to the Code Editor here.