It's a best practice to include parts of your instructions in-line in a job. jQuery Popovers are a great way to do so. This article describes how to use jQuery popovers in your job.
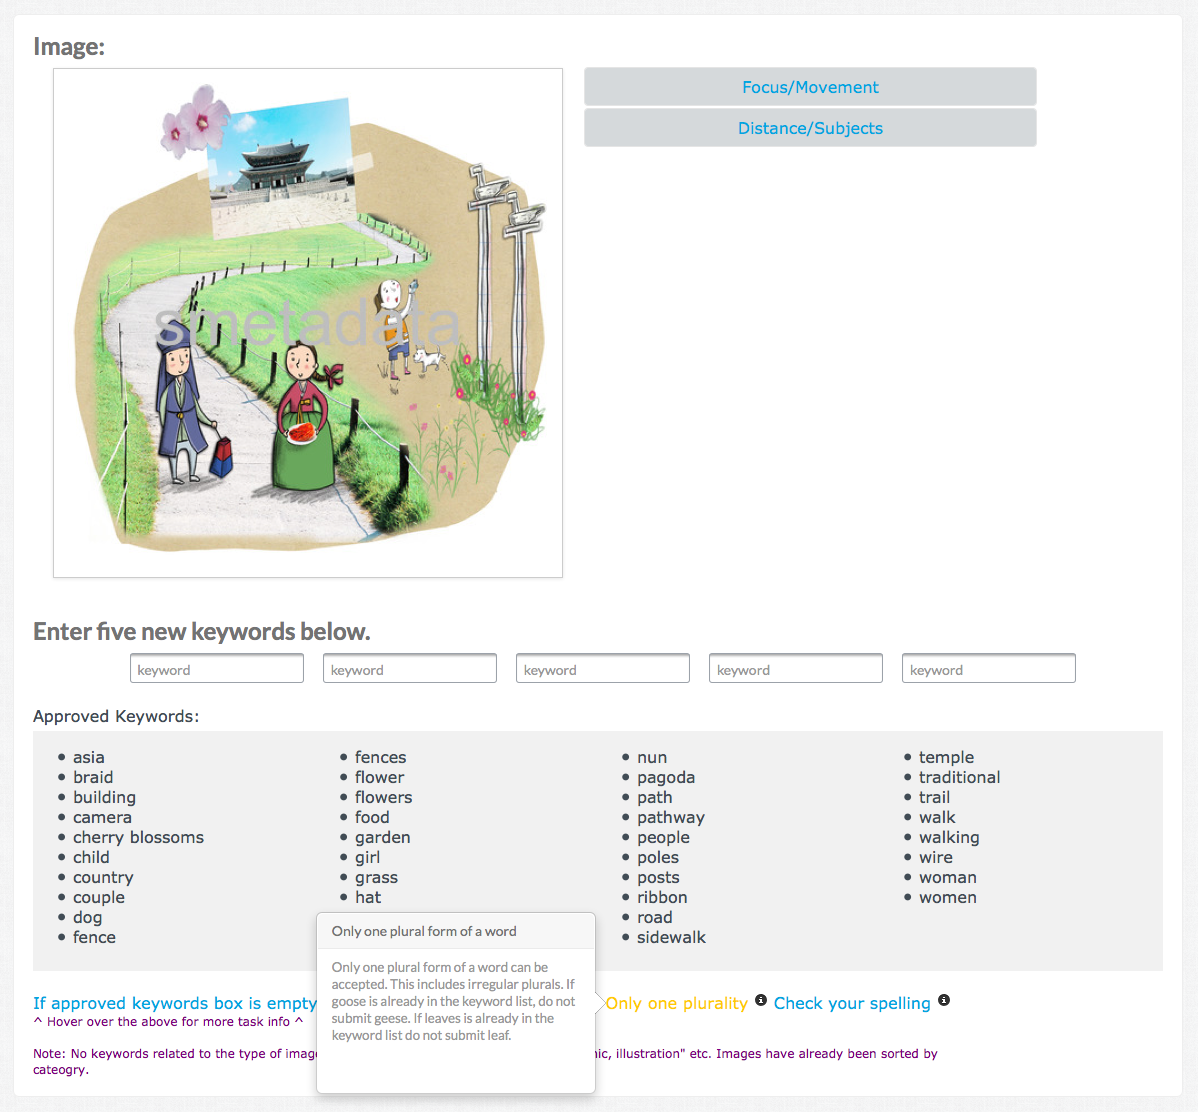
Have a look at a unit from this job:

Unit with jQuery popover instructions in-line
You'll notice that at the bottom of the form, there is a popover when the mouse hovers over an in-line instruction.
The code for these popovers is written in the Code and JavaScript editors.
The HTML code for one popover from this job is given below. It can be copy/pasted from here:
<div class="instruction-tooltips">
  <a target="_blank" href="#" rel="popover"  tabIndex="-1" class="no_url cheat_sheet">
    If approved keywords box is empty <i class="icon-info-sign"></i>
  </a>
</div>
The JavaScript code from this example can be copy/pasted from here:
require(['jquery-noconflict','bootstrap-modal','bootstrap-tooltip','bootstrap-popover','jquery-cookie'], function($) {
  Window.implement('$', function(el, nc){
    return document.id(el, nc, this.document);
  });

  var $ = window.jQuery;

  $( '.no_url').click(function( event ) {
    event.preventDefault();
  });

  $('.no_url').popover({
    html:true,
    placement:'left',
    trigger:'hover',
    title:'Popover title',
    content:'<p>Popover content.</p>'
  });
});
Note: We need to add the jQuery library to the job and ensure that MooTools is implemented correctly. The first 7 lines of code in the JavaScript editor handle this.
Note: This code is for one popover. Additional popovers can be written in the same way.
To implement these in your job, all you need to do is copy and paste this code into your job and customize the content of the popovers.
Another useful tool to add in-line instructions in a job is a collapsible container. See the Collapsible Container article to learn more.